Draw shapes and labels on the canvas
Shapes turn a working topology into a readable diagram: box a site or a VLAN, label a zone, point an arrow at the thing that matters. Annotations live in the lab file, so they export and share with it.
This guide draws a zone box around two PCs and drops a text label on it.
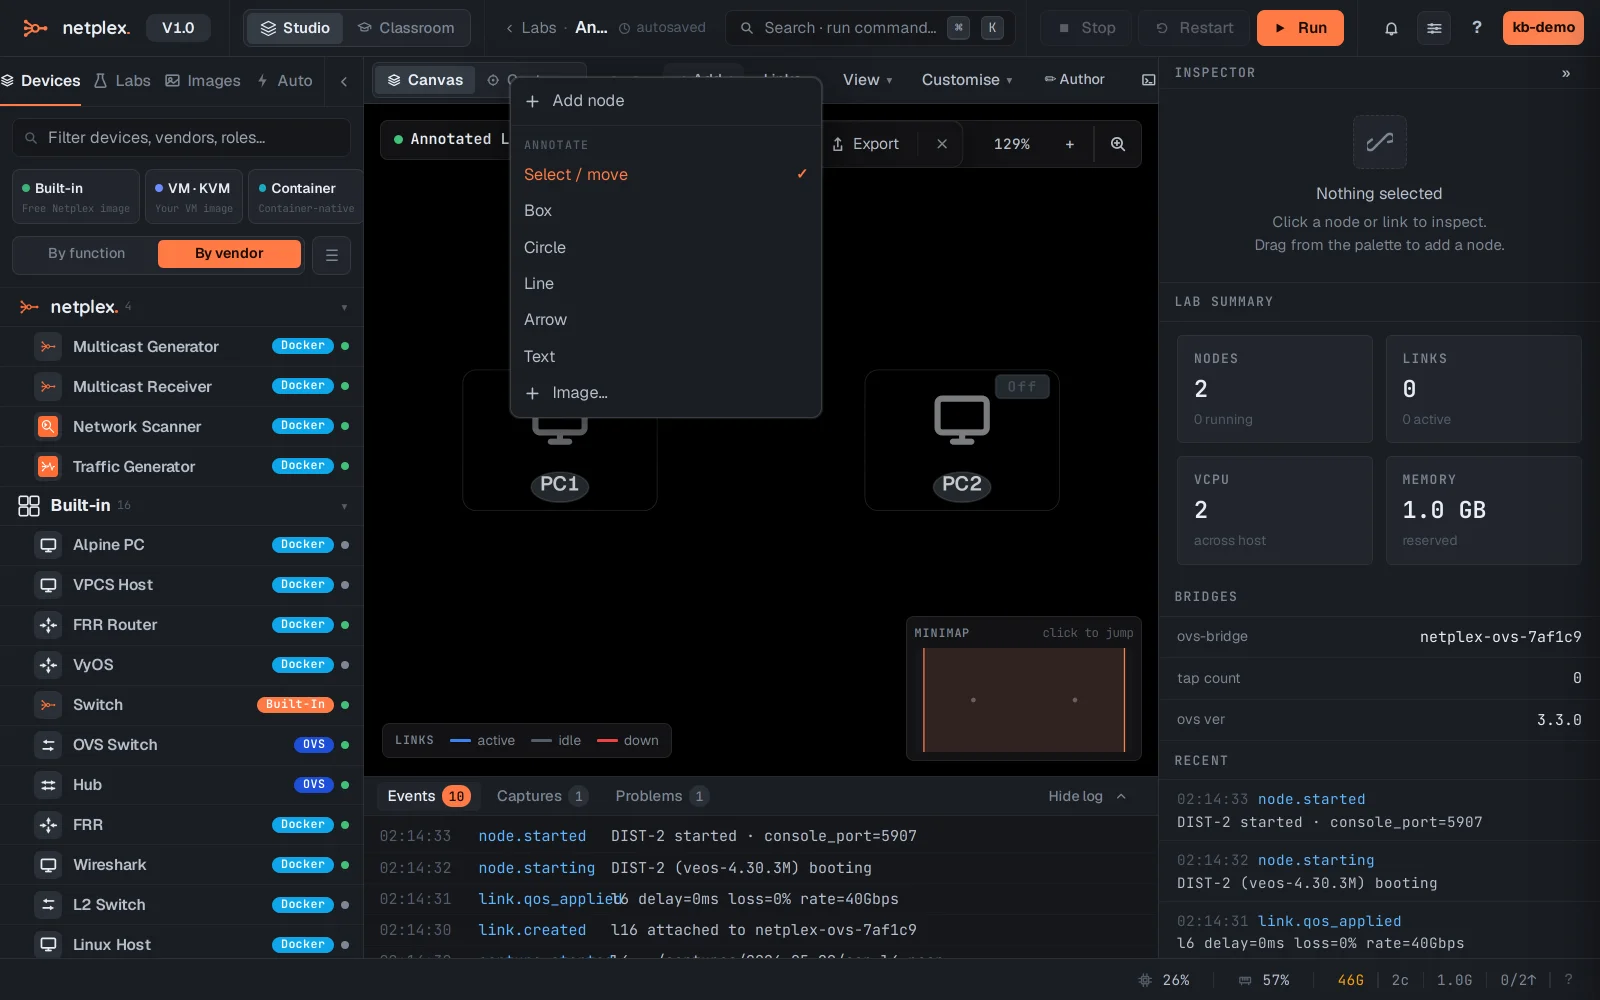
Open the + Add menu in the canvas toolbar. Under Annotate you get Box, Circle, Line, Arrow and Text tools; Select / move returns to the normal cursor.
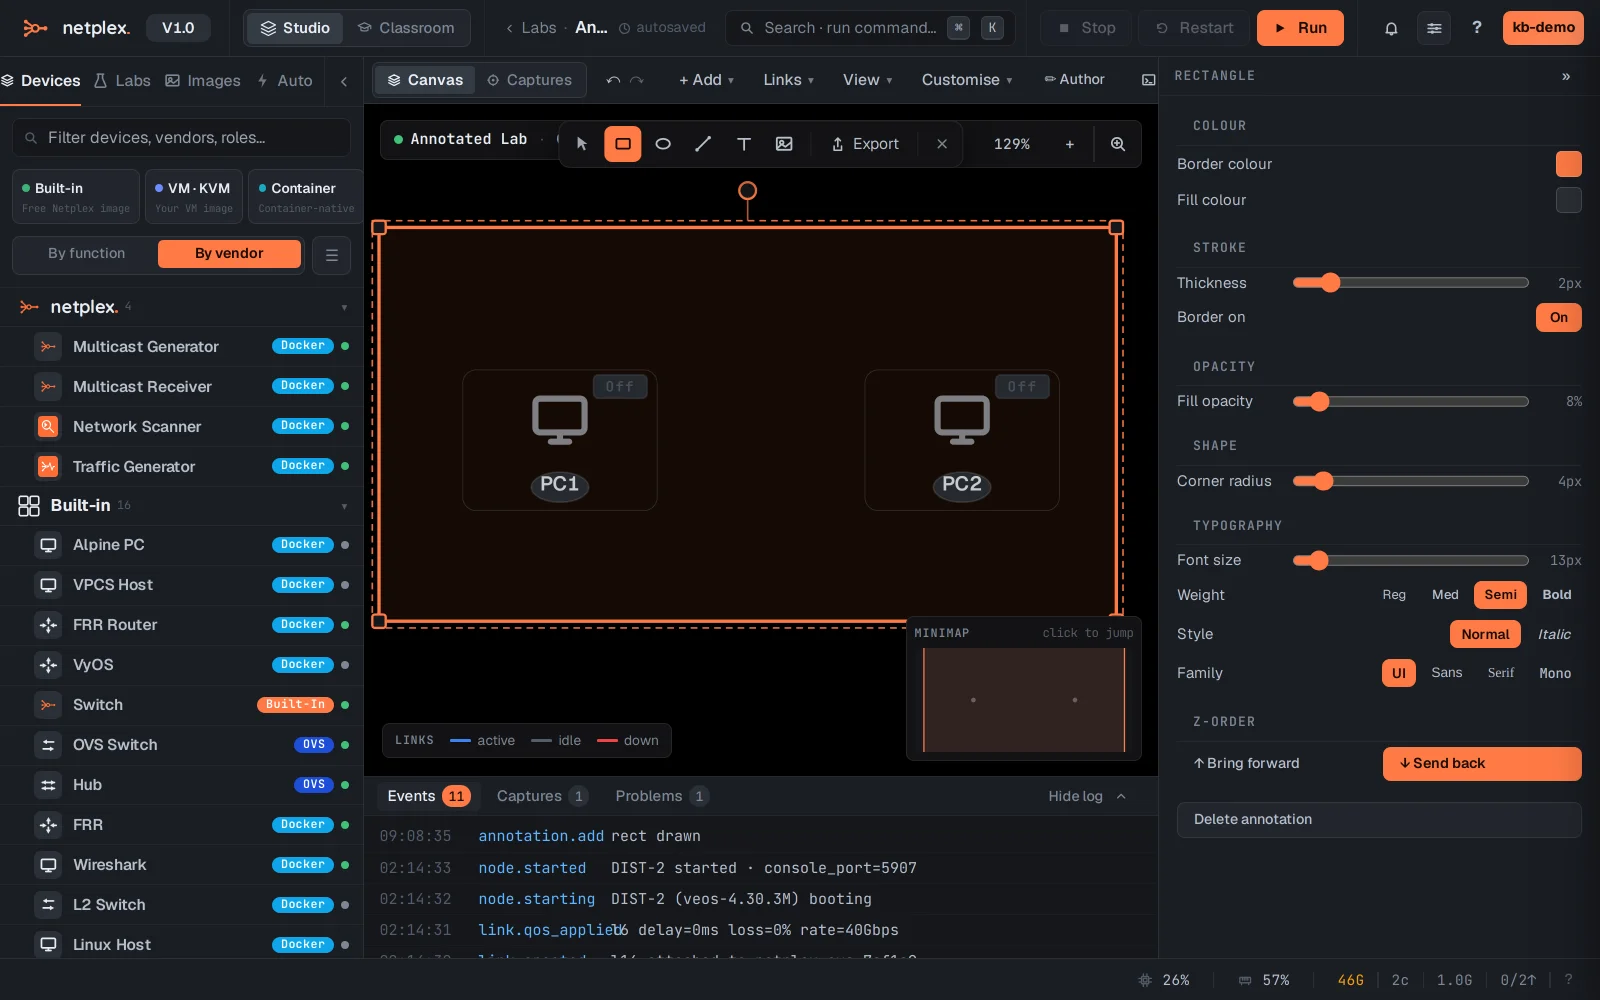
Choose Box. The cursor becomes a crosshair - drag on the canvas to draw the rectangle around the devices you want to group. The shape style panel opens on the right: colours, stroke, fill opacity, corner radius.
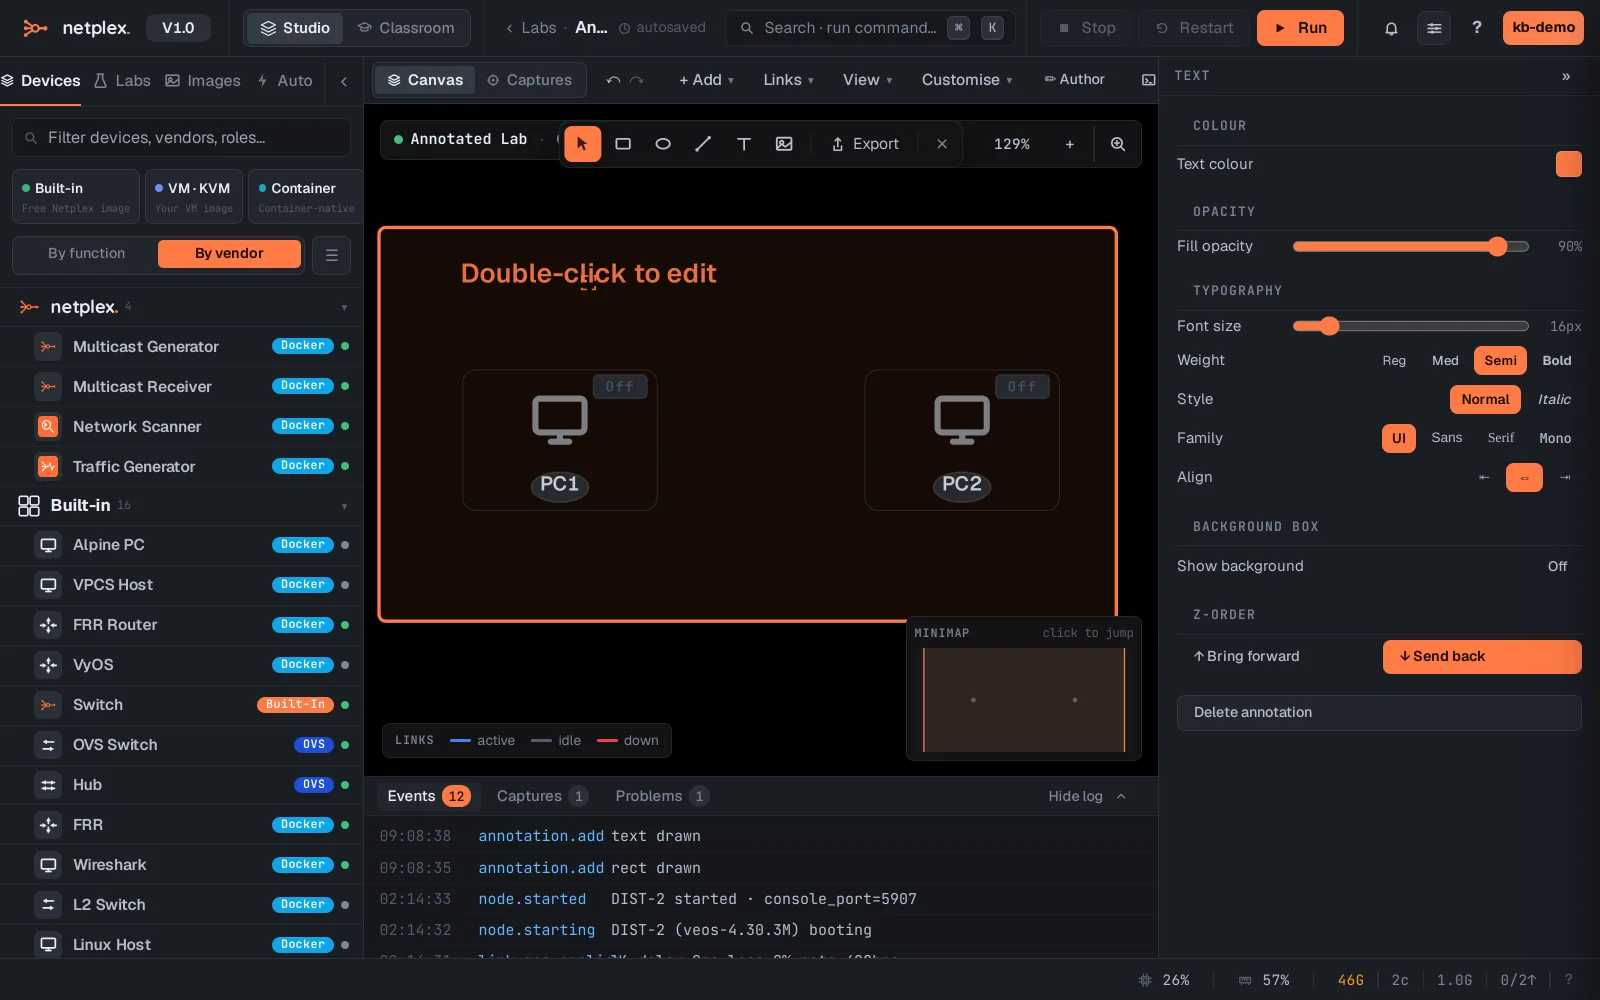
Pick Text from the same menu and click where the label should sit - here inside the top of the zone box. A placeholder appears; double-click it any time to edit the wording.
Switch back to Select / move to reposition or resize shapes. Right-click any shape for colours and layering; select one and press delete to remove it.
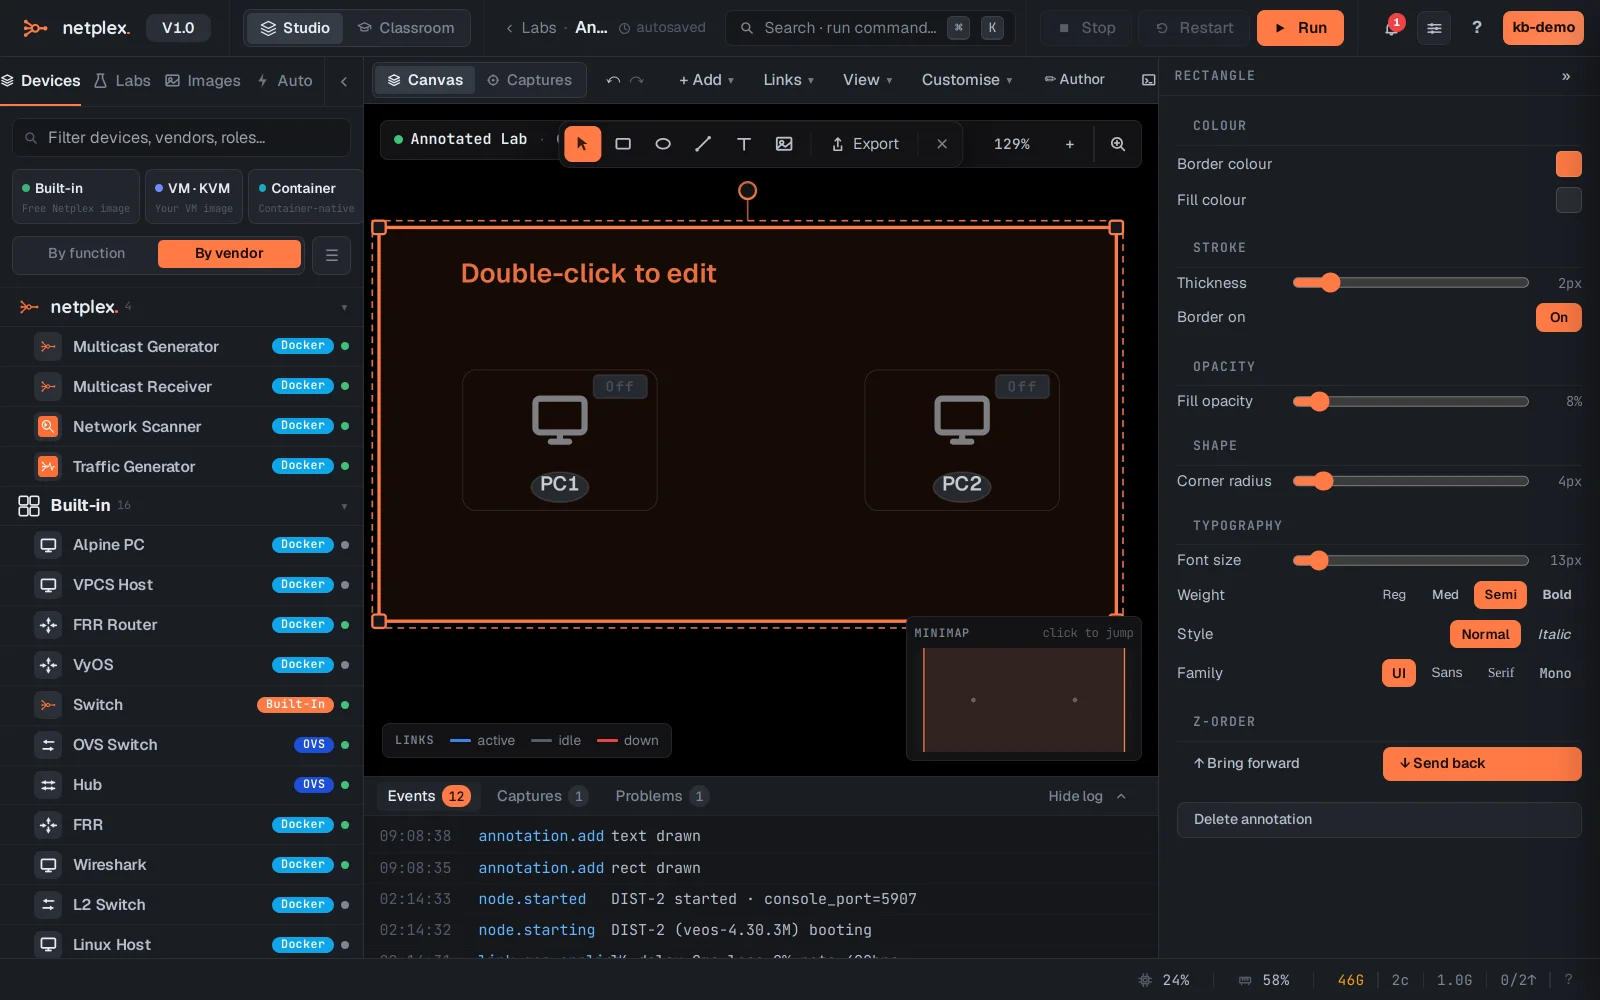
Annotations are part of the lab: they autosave, export with the topology (PNG/PDF included) and travel inside the .npx file when you share it.