Command Centre: Build, Assign, Mark and Results
The Command Centre's rail is the whole class session, front to back: Build the lab and its items, Assign it to a class with a due date, run the session under Live (see "The Command Centre: a full-screen console for running a class"), Mark the results, then read Results as a gradebook. This tour covers the four stages around Live.
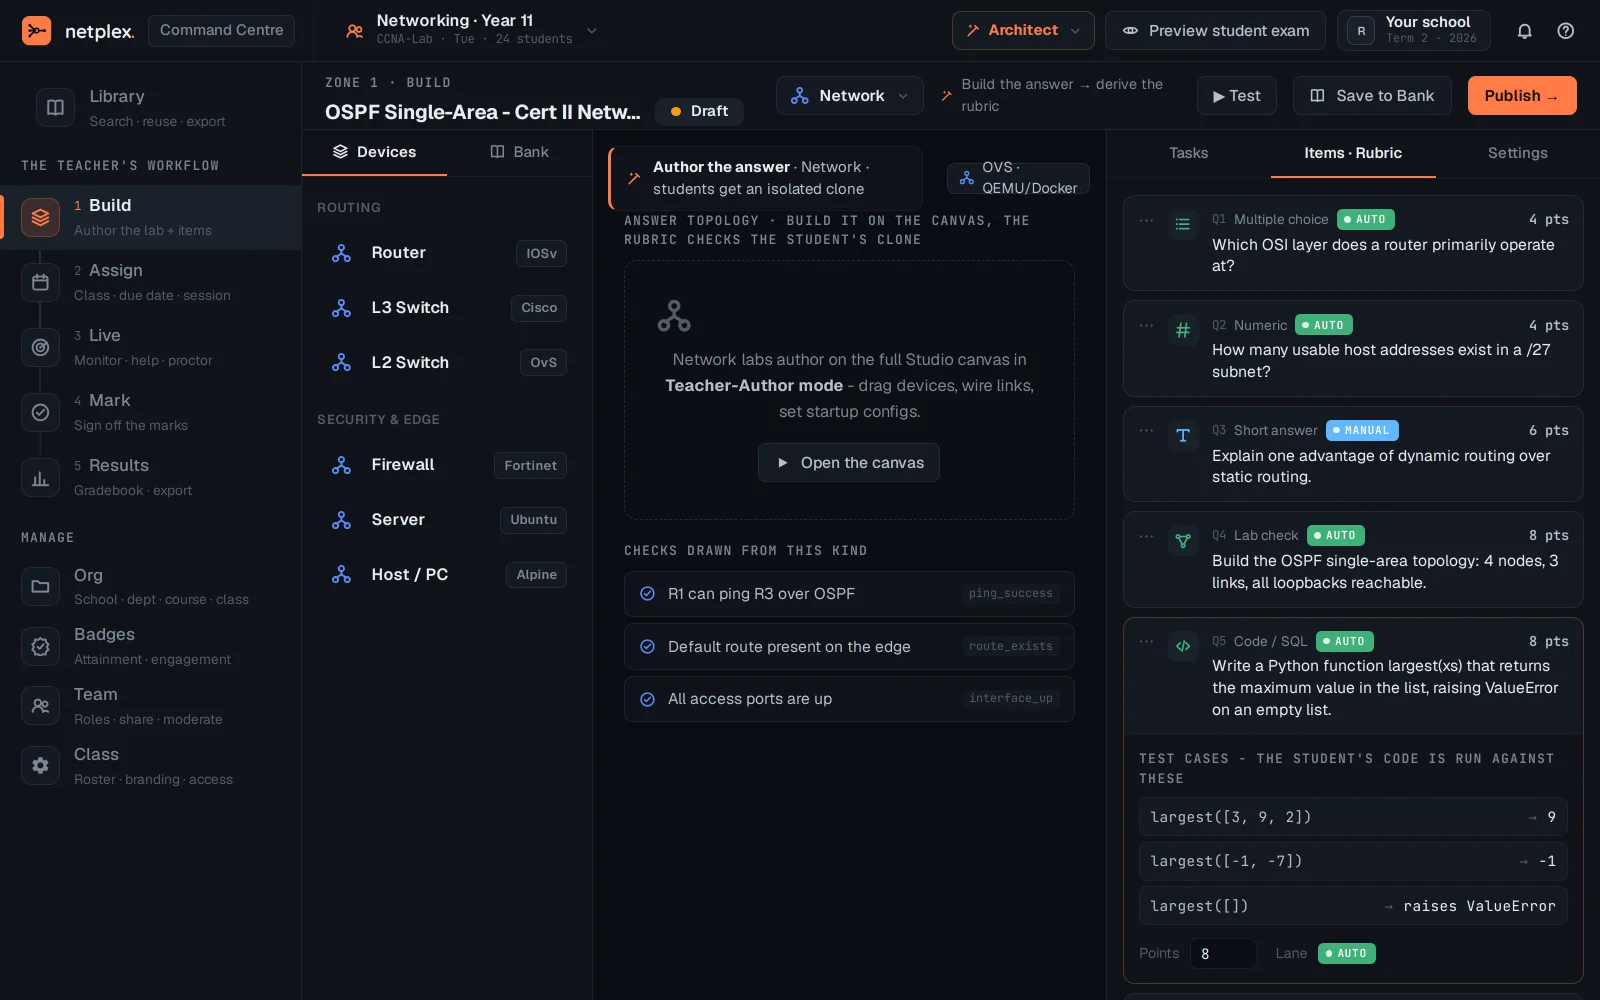
Open Command Centre → Build. This is where the lab itself gets authored - the topology and any exam items - before it is ever assigned to a class.
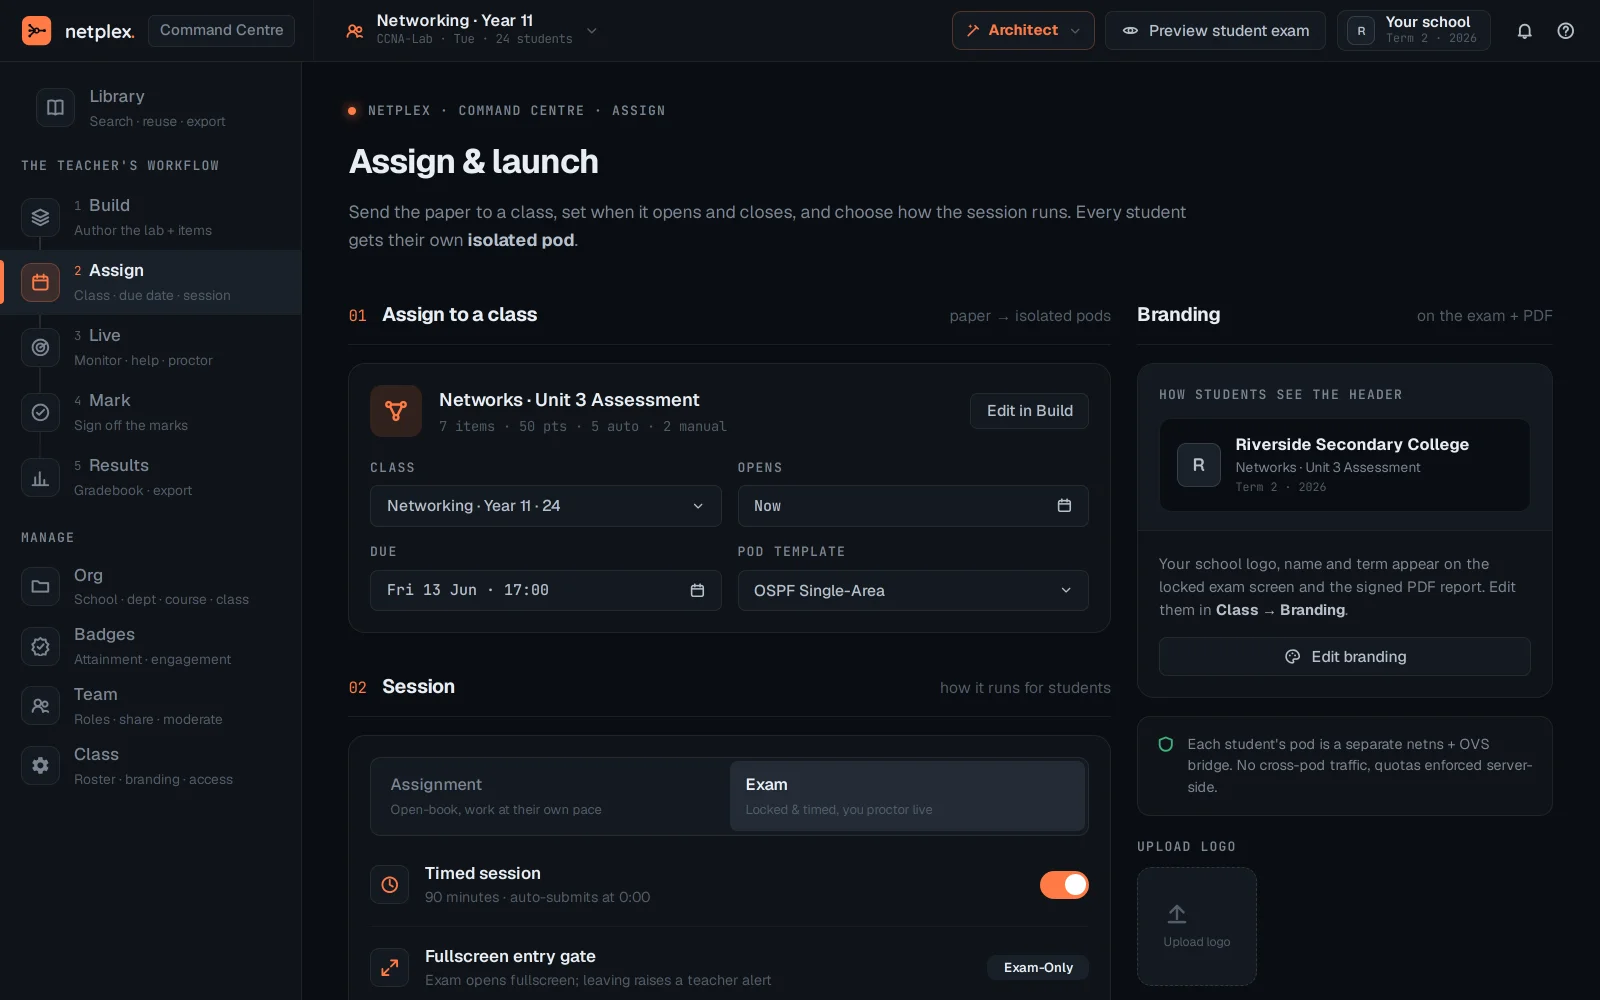
Assign hands the built lab to a class - pick who gets it and when it is due, the same assignment a student sees land in their queue.
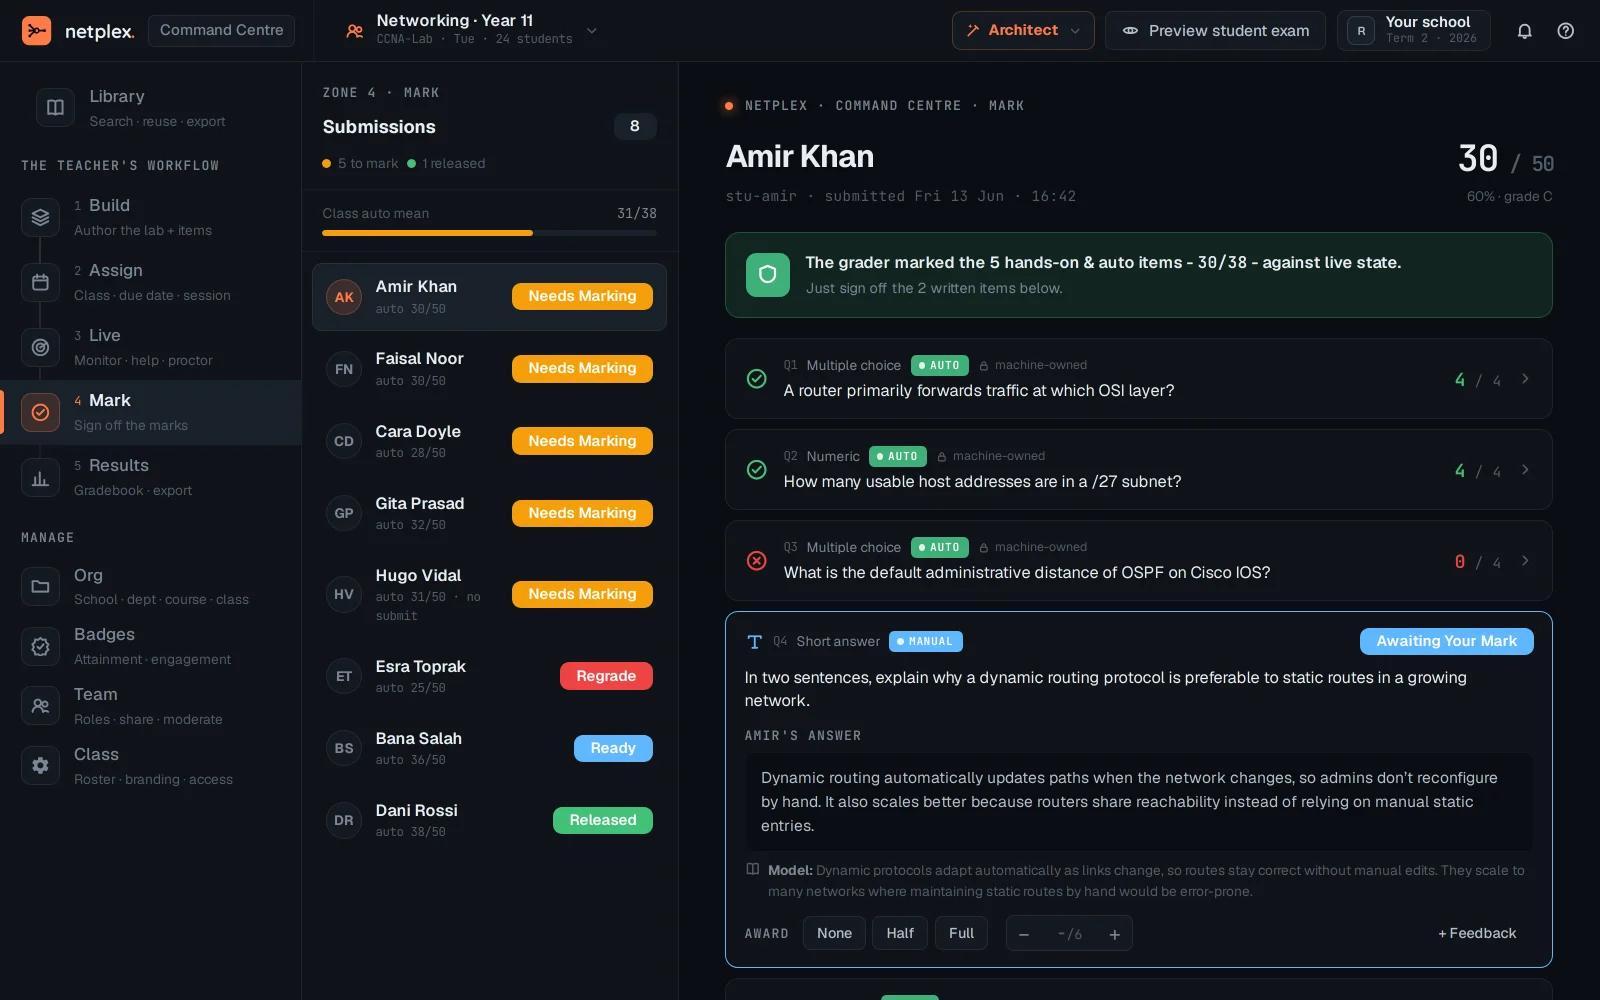
Mark is where submissions get graded once the session ends - one student at a time, right after Live.
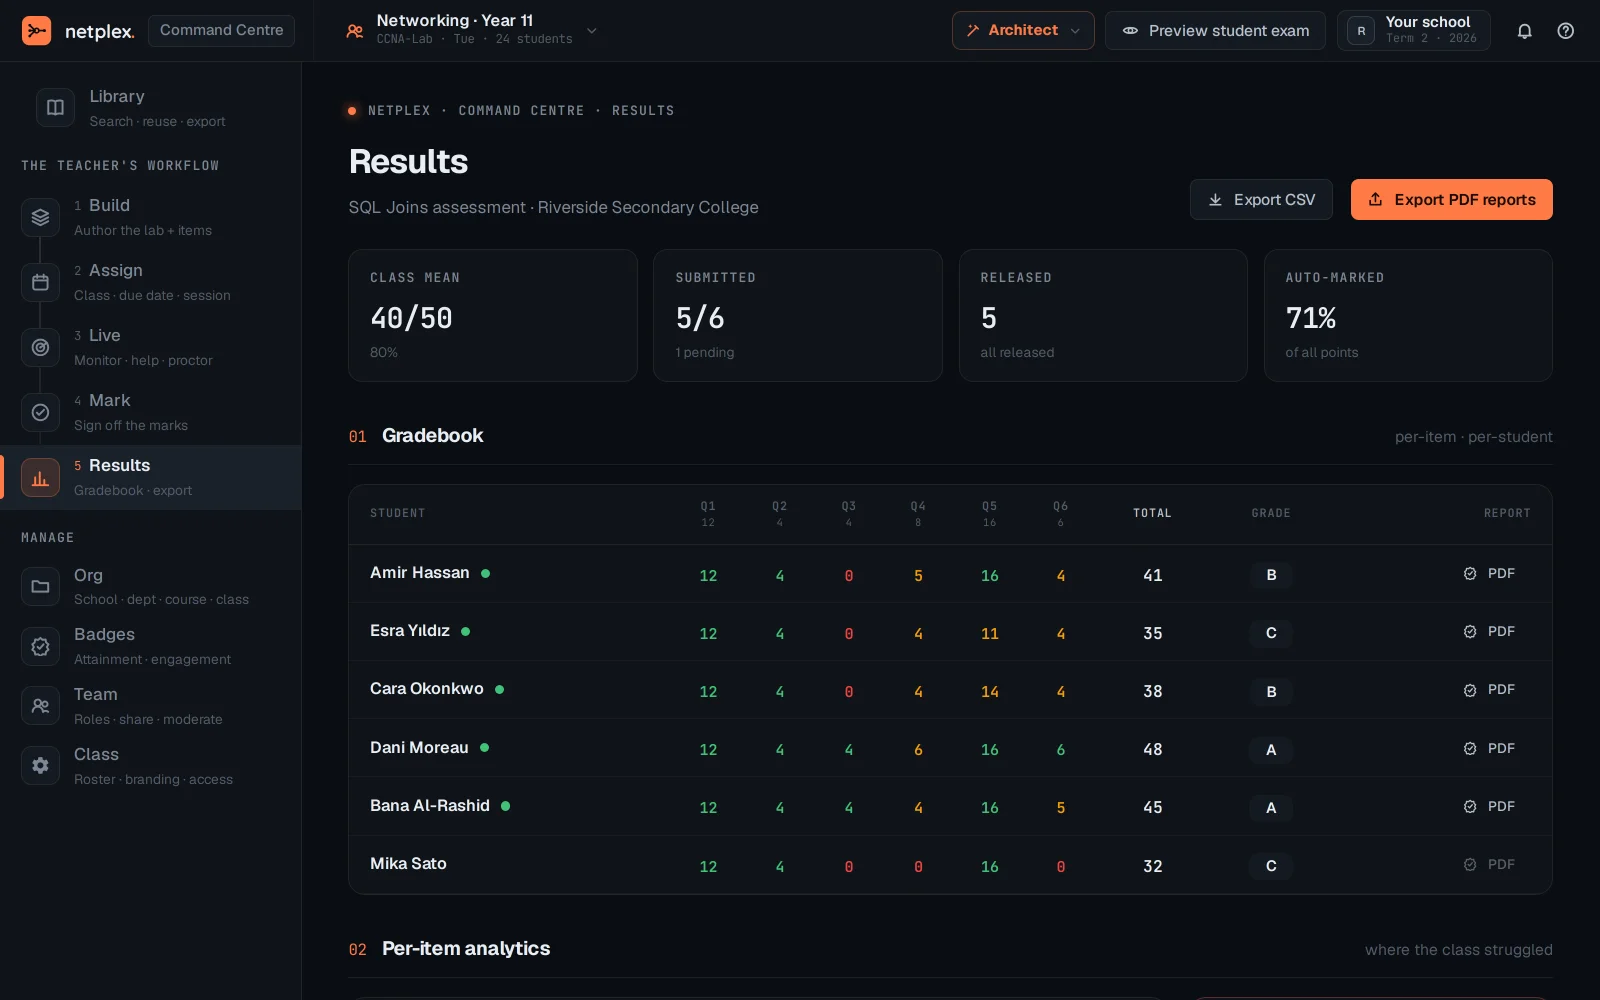
Results rolls the whole class up into a gradebook - the same aggregate view as the Education dashboard's Gradebook tab, reachable without leaving the Command Centre.
Build → Assign → Live → Mark → Results is the whole arc of one class session, numbered 1-5 down the rail so it reads as a checklist during a live lesson. See "The Command Centre" for the Live monitoring view, and "Grading, gradebook and feedback" for the same marking workflow from the regular Education dashboard.